Kohinoor Product
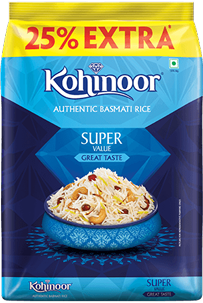
Kohinoor Super Value Authentic Basmati Rice (25% Extra)
Read MoreAuthentic Step-by-Step Vegetarian Recipe


Navratan pulav is loved for its mild, royal flavour and its colourful mix of vegetables, paneer, nuts, and fruit. The name means "nine gems," and the dish is meant to feel rich and festive. Yet the home version often turns out either bland or mushy.
This guide explains the full Navratan pulav recipe in a simple way. It covers how to choose the right rice, prep and sauté the vegetables, cook the rice to fluffy grains, and fold in the nuts and fruit at the end. Follow each step, and you can make a festive, restaurant-style pulav at home with better results.
To get the right taste, you need good-quality ingredients. Each one plays an important role in flavor and texture.
For ease, you can also use a Hyderabadi biryani kit from Kohinoor. It gives you a ready spice mix and saves time while keeping the flavour balanced.


The chicken base decides the final taste of your biryani. Do not rush this step.
A well-marinated base is what makes a true chicken biryani recipe's basmati rice taste rich & layered.
Rice is just as important as the chicken. It must be cooked to the right stage. Wash the rice 2-3 times to remove excess starch. Soak it for 30 minutes. This helps the grains cook evenly. Boil water with salt and whole spices. Add the soaked rice. Cook until it is about 60-70 percent done. The grain should break with slight pressure but still hold shape.
Drain the rice immediately. Do not overcook it. This step is important for perfect dum biryani rice. Parboiling matters because the rice will cook further during dum. If you fully cook it earlier, it will turn soft and sticky later.

Layering is what gives biryani its signature look and taste. Follow the order carefully.
Keep layers medium in thickness. Very thick layers do not cook evenly. If you do not have a handi, use a heavy-bottomed pot with a tight lid. Even layering helps heat spread evenly and improves flavour. This is a key step in Hyderabadi biryani step-by-step cooking.
Dum cooking is what brings everything together. It traps steam and builds aroma.
Low heat allows slow cooking. This helps the rice and chicken cook together without burning. You can check doneness by smell. A rich aroma will start to come out when it is ready. Do not open the lid during cooking. After turning off the heat, let it rest for 10 minutes. This helps settle the layers. This is the final stage of how to make dum biryani properly.
Serve the biryani by gently lifting from the side. This helps keep layers intact. Do not mix too much. Serve hot with raita or mirchi ka salan for a complete meal.
To fix these, always use the best rice for biryani, follow proper marination time, and ensure the dum is sealed well. Small steps make a big difference in the final dish. Making Hyderabadi dum biryani at home becomes easier when each step is done with care. From choosing the right rice to proper layering and dum cooking, every stage adds to the final taste. Use good quality ingredients, follow the process patiently, and avoid rushing. With practice, you can enjoy a flavourful and well-balanced biryani every time.
Whole spices like cumin, bay leaf, cloves, cinnamon and cardamom are key. They gently release flavour into the rice and give veg pulao its comforting aroma.
Use ghee, fried onions, roasted nuts and dry fruits, a dash of saffron milk, and robust whole spices to add depth and richness without meat.
Carrots, beans, peas, potatoes and cauliflower work best. They hold their shape well and blend nicely with rice, giving good texture and balanced flavour.
Soak basmati rice for around 30 minutes. This helps the grains cook evenly and stay long, fluffy, and separate in the finished veg pulao.
Pair veg pulao with mild creamy curries (shahi paneer, korma), dal makhani, cucumber raita, salad, pickles or mango chutney for a balanced, festive meal.